
Create Monthly SonarQube Report Using RestClient And Notify With Slack

Introduction
In this article, we will create a Java Spring Boot application that generates a simple PDF report based on monthly resolved and created issues. You will need a running SonarQube application for this tutorial. The provided Docker Compose file includes all the necessary components to run SonarQube Community Edition on your server. If you encounter any errors with SonarQube, you can find more information about installation and possible fixes here:
How to Install SonarQube Community Edition Using Docker on a Linux Server
A comprehensive guide to setting up SonarQube Community Edition with Docker and PostgreSQL on a Linux server for continuous code quality inspection.
Read article
Spring Boot
Spring Boot, an extension of the Spring Framework, has revolutionized development for countless developers. It enables the creation of stand-alone, production-grade Spring-based applications with minimal configuration. Whether you're a seasoned developer or just starting out, Spring Boot simplifies your journey by offering opinionated defaults and essential features.
SonarQube
SonarQube is a comprehensive code quality management platform that meticulously examines every aspect of your codebase. It performs both static and dynamic analysis of source code, ranging from minor styling choices to critical design errors. Developers receive actionable insights to continuously enhance code quality.
Slack
Slack is a messaging app designed for businesses, connecting people to essential information. It fosters collaboration, flexibility, and inclusivity.
Developing Solution
RestClient Configuration
Spring Framework 6.1 M2 introduces the RestClient, a new synchronous HTTP client. As its name suggests, the RestClient combines the fluent API of WebClient with the infrastructure of RestTemplate.
We first write a configuration for our RestClient. This configuration sets a 5-second timeout and the base URL of our running SonarQube application. Additionally, we include authorization in the header. With this configuration, we eliminate the need to specify the base URL and authorization every time we call the RestClient.
@Configuration
@RequiredArgsConstructor
public class RestClientConfig {

    private final SonarProperties sonarProperties;

    @Bean
    public RestClient restClient() {

        SimpleClientHttpRequestFactory factory = new SimpleClientHttpRequestFactory();
        factory.setConnectTimeout(5000);
        factory.setReadTimeout(5000);

        return RestClient.builder()
                .baseUrl(sonarProperties.getUrl())
                .defaultHeader("Authorization", "Bearer " + sonarProperties.getToken())
                .requestFactory(factory)
                .build();
    }
}
Here is the SonarProperties class, responsible for reading related fields from the application.yml file:
@Configuration
@ConfigurationProperties("sonar")
@Getter
@Setter
@AllArgsConstructor
@NoArgsConstructor
public class SonarProperties {

    private String url;
    private String token;
}
Slack Settings
Slack Apps leverage the full scope of the platform, unlocking enhanced and powerful experiences within Slack. To enable this, each Slack app utilizes a range of APIs, providing access to read, write, and update all kinds of data in Slack.
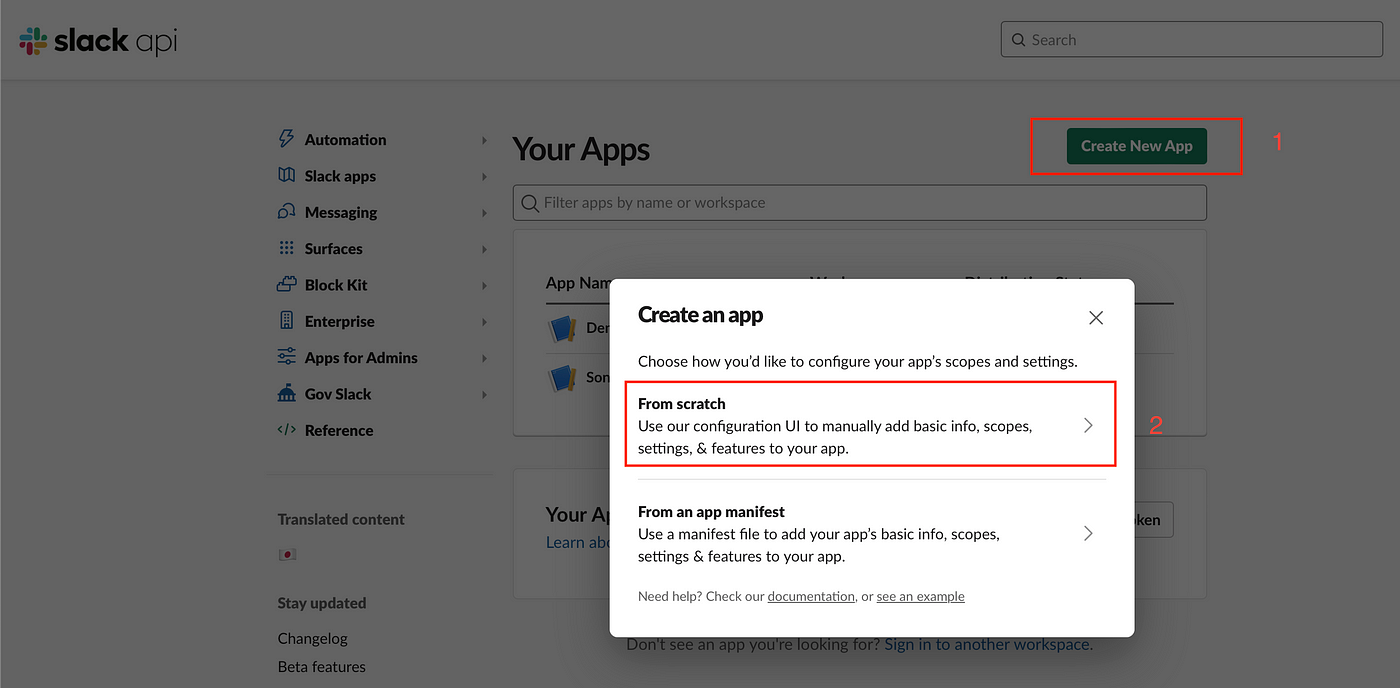
To access the Slack API Apps section, you can click here. After clicking "Create New App," choose "From scratch" from the options provided.
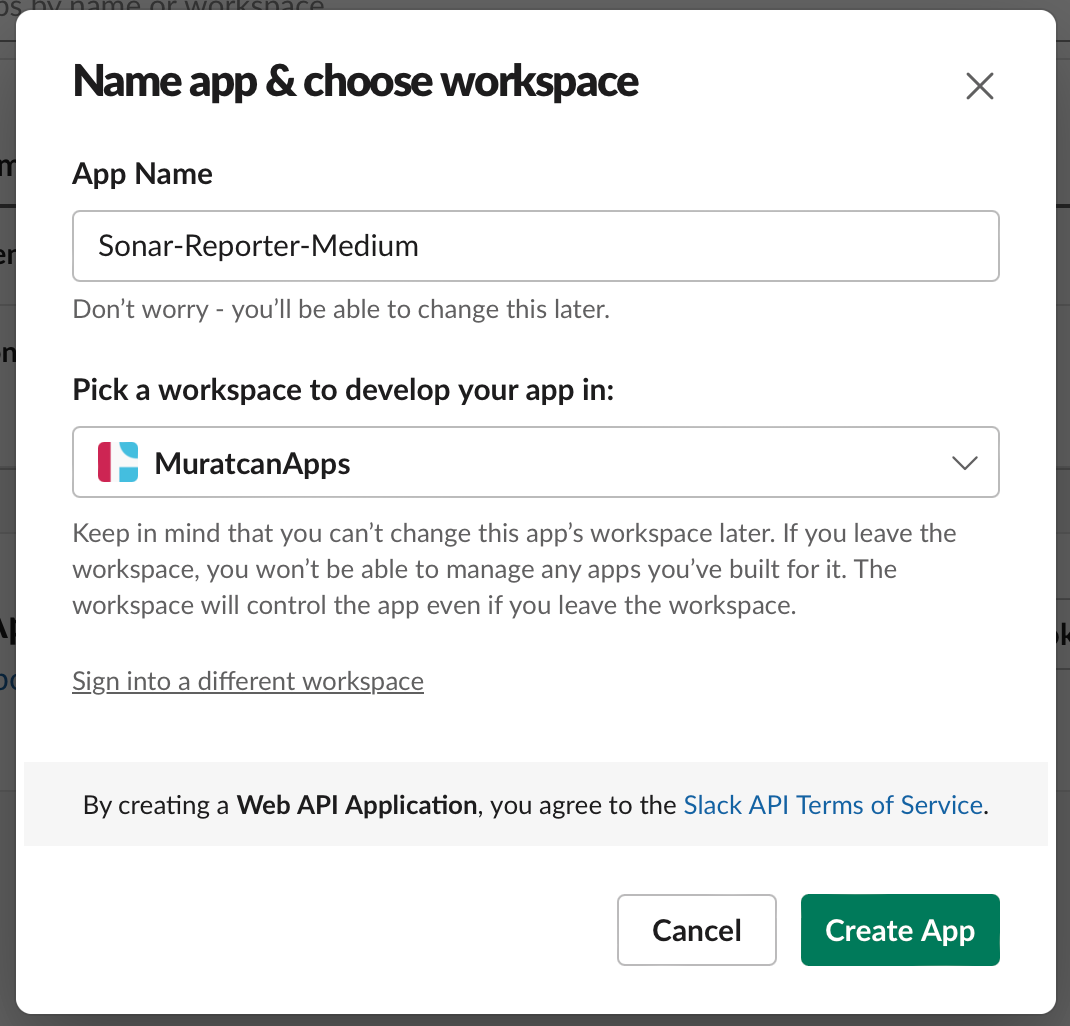
Following that, enter your App Name, select the relevant workspace, and proceed to create your app.
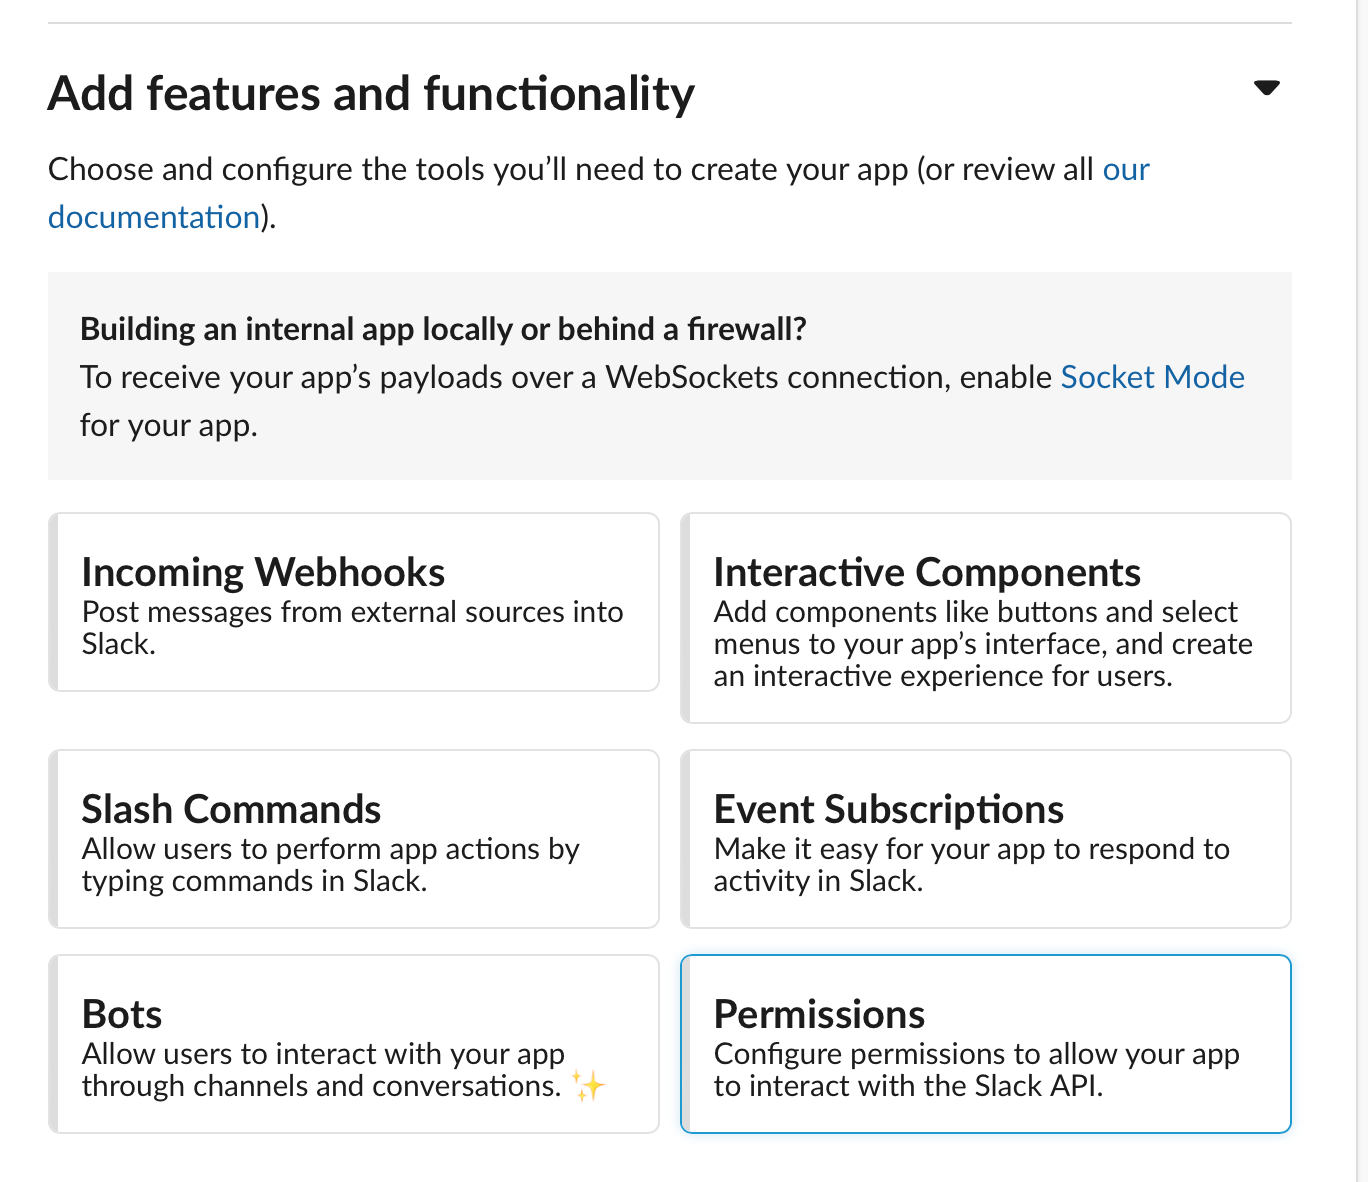
Afterwards, navigate to the "Features and Functionality" section, and choose "Permissions"
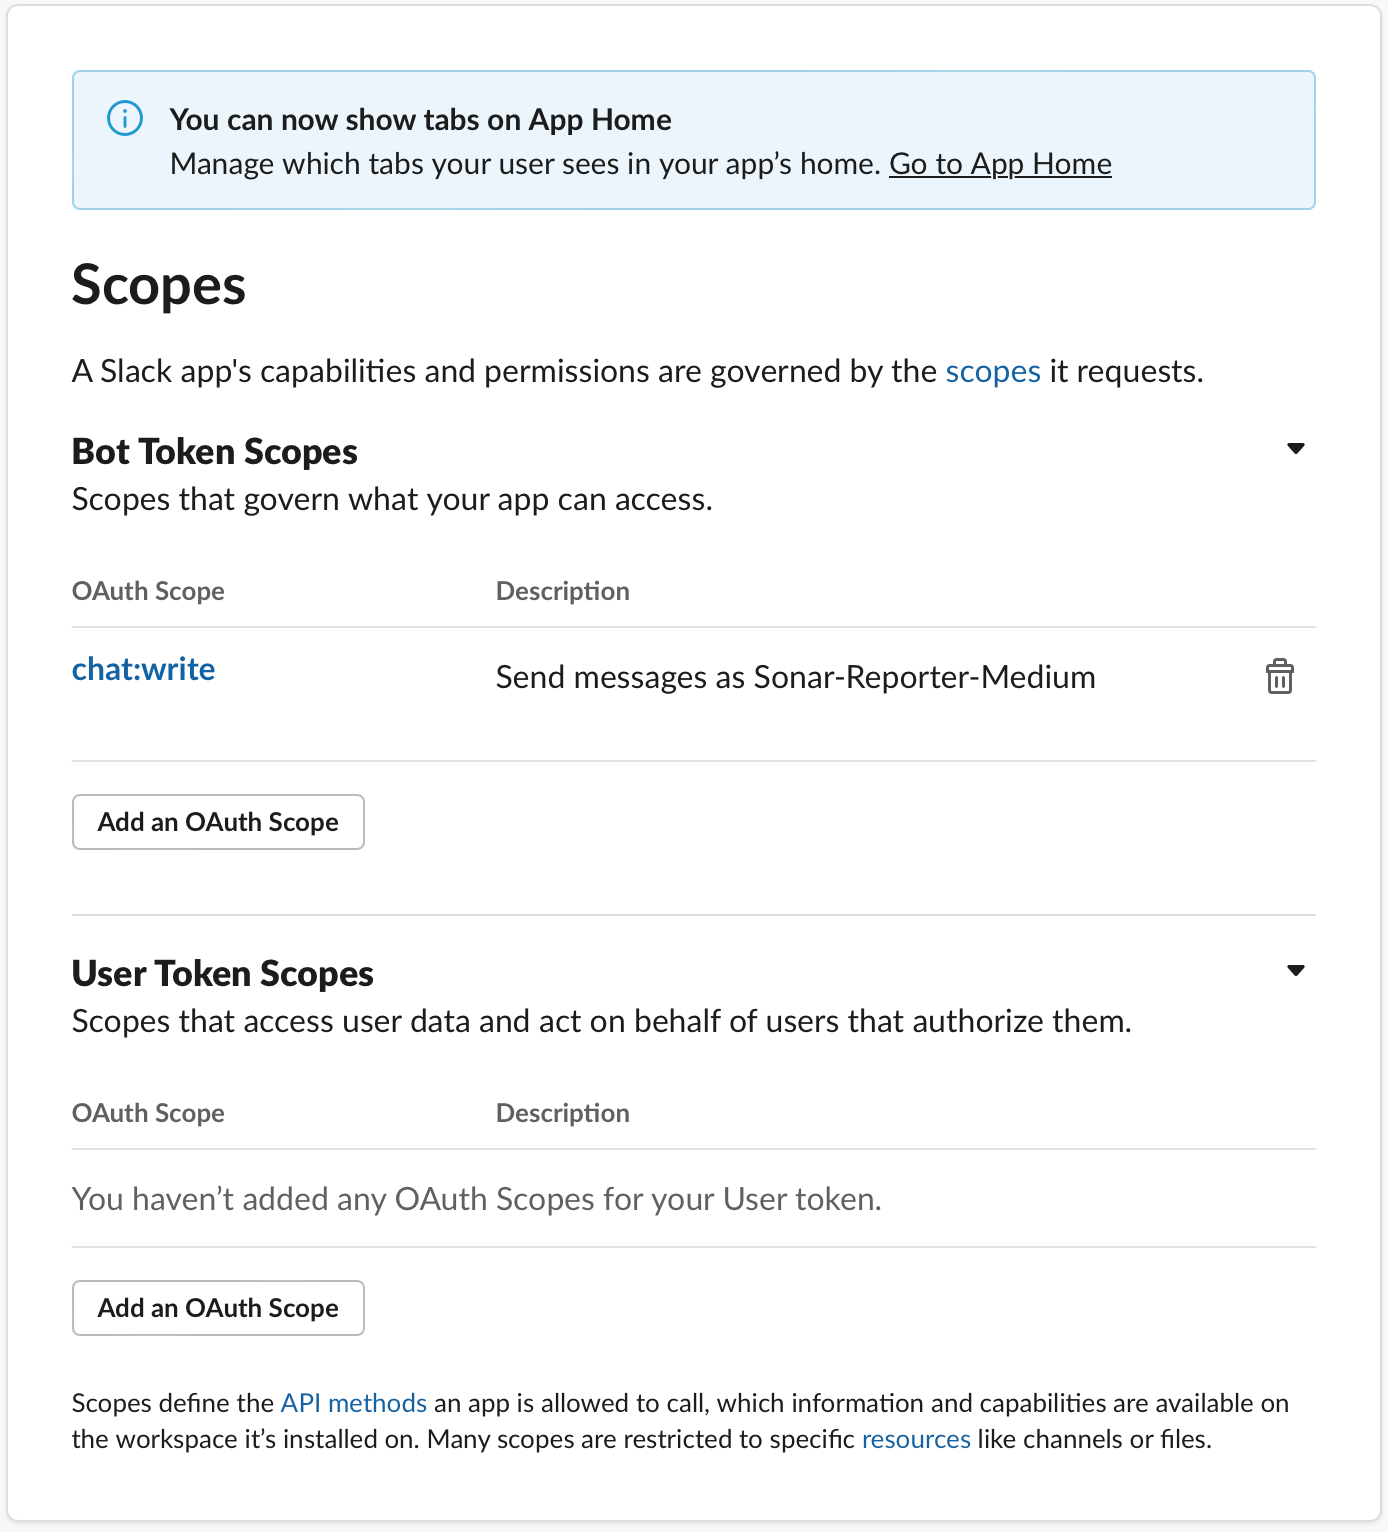
Scroll down to the "Scopes" section, and add "chat:write" to the "Bot Token Scopes"
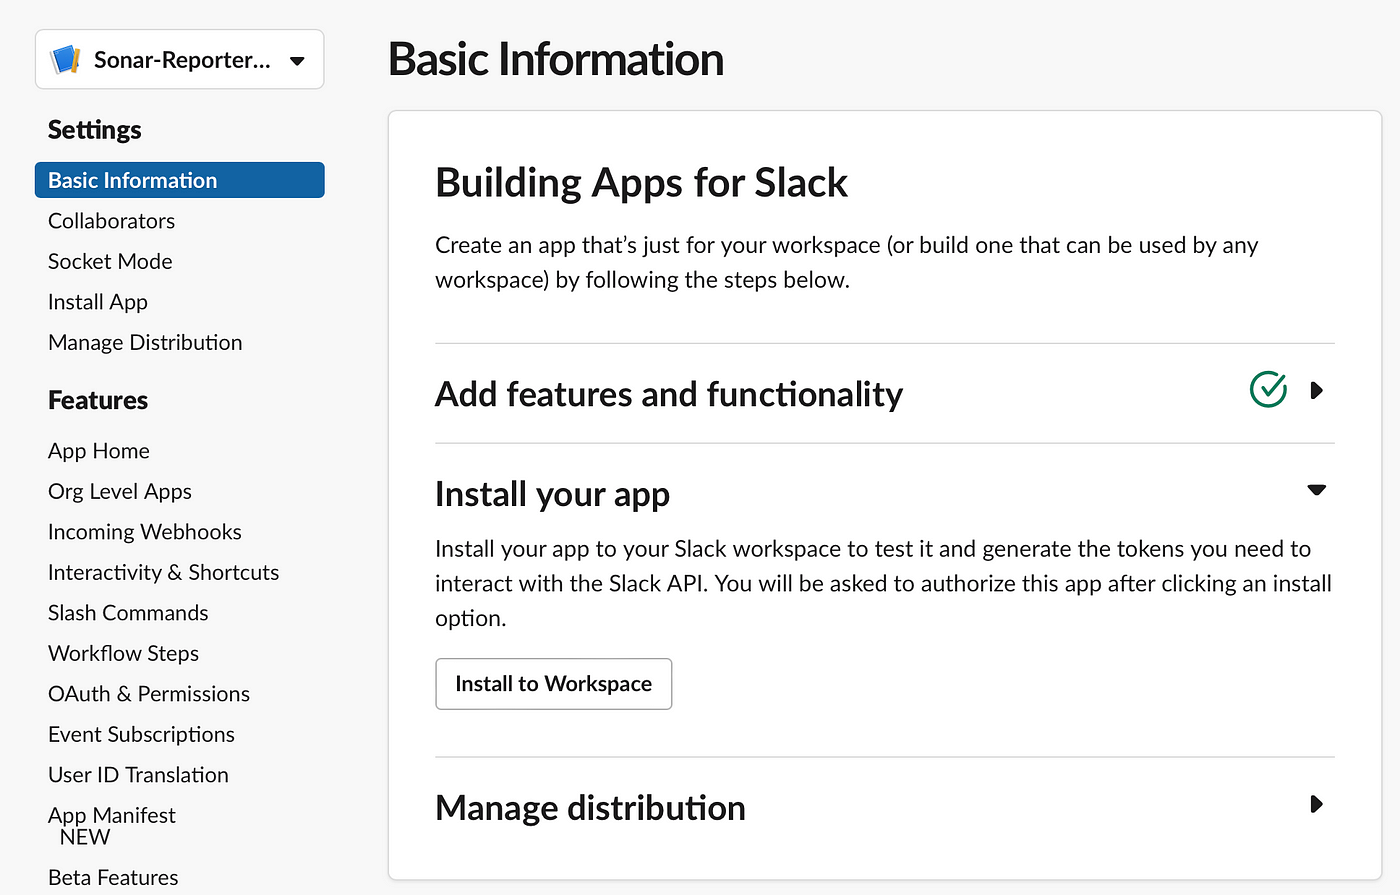
Then, return to the "Basic Information" tab and click on "Install to Workspace"
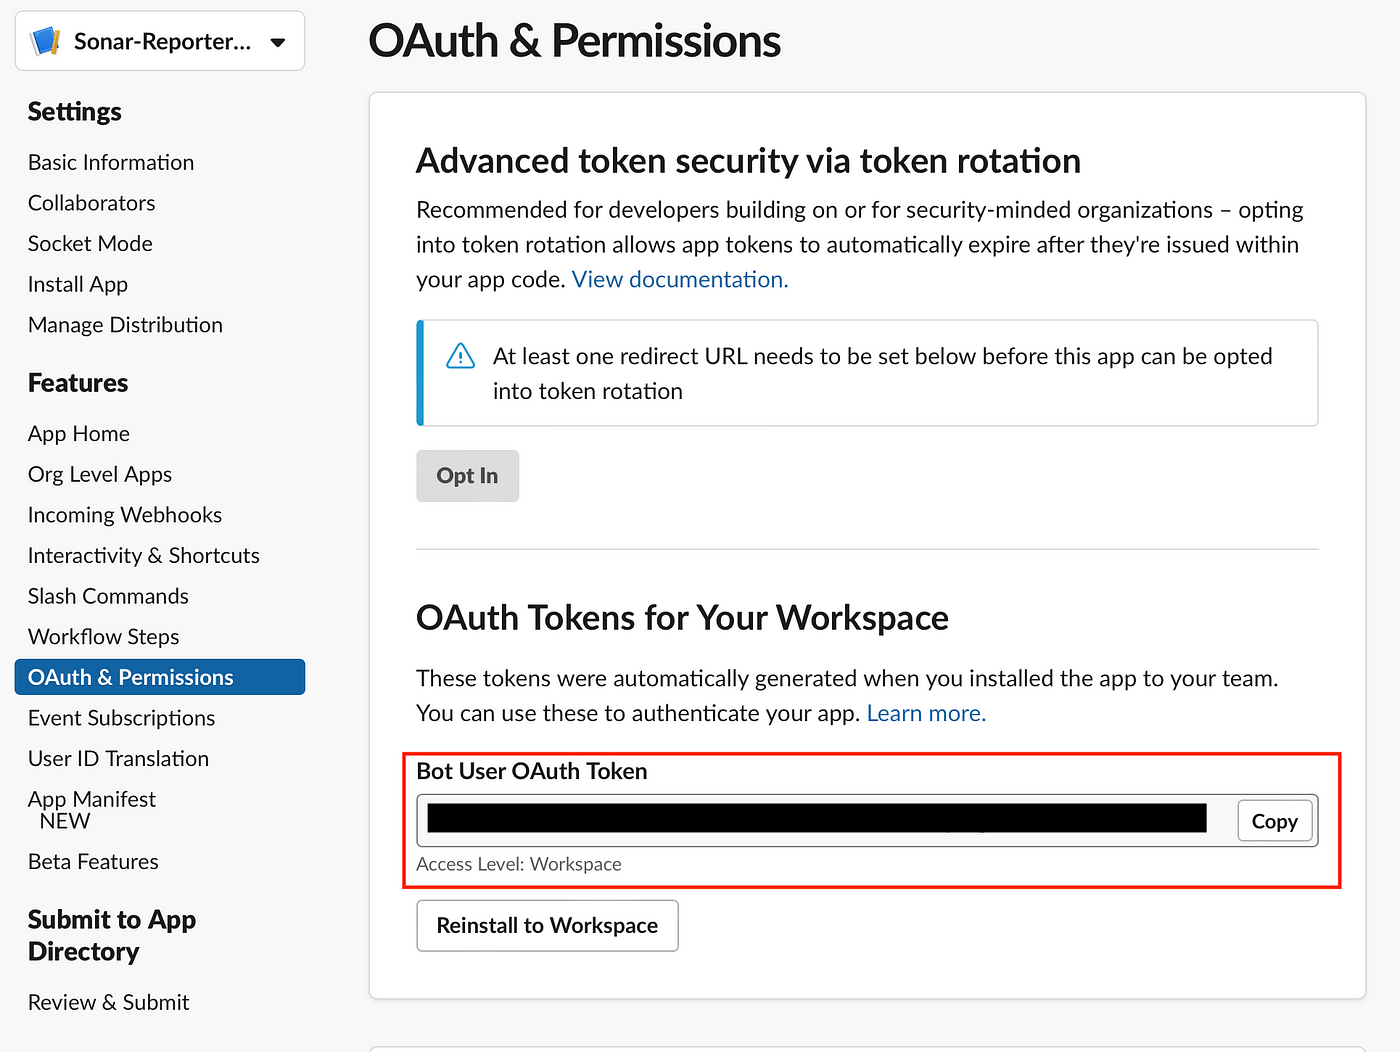
Lastly, navigate to the "OAuth & Permissions" tab, where you'll find your Bot User OAuth Token. You can copy this token for integration with Slack to send messages via the platform.
Here is the configuration class for Slack Client.
@Configuration
@RequiredArgsConstructor
public class SlackMethodsClientConfig {

    private final SlackProperties slackProperties;
    private final Slack slack;

    @Bean
    public MethodsClient methods() {
        return slack.methods(slackProperties.getToken());
    }
}
Sonar Configuration
To generate a token for using the Web API of SonarQube, follow these steps:
- Click on the profile icon located on the right side of the screen.
- Select "My Account" from the dropdown menu.
- Navigate to the "Security" section.
- Provide a name for your token.
- Select "User Token" as the type of token.
- Select your desired expiration time for the token.
- Click on the "Generate" button.
- Copy the generated token.
- Paste the token into your
application.ymlfile for using the SonarQube Web API.
Docker Compose
Alternatively, you can pass all environment variables, such as the Sonar token and Slack token, via Docker Compose. This allows for convenient management and configuration of your application's environment variables within the Docker ecosystem.
version: '3.8'
services:

  reporter:
    build:
      context: .
      dockerfile: Dockerfile
    container_name: sonar-reporter
    environment:
      SONAR_URL: http://sonarqube:9000/
      SONAR_TOKEN: INSERT_YOUR_SONAR_TOKEN_HERE
      SLACK_TOKEN: INSERT_YOUR_SLACK_TOKEN_HERE
      SLACK_CHANNEL_ID: INSERT_YOUR_CHANNEL_ID_HERE
      SLACK_USERNAME: Sonar Reporter
    ports:
      - "7001:7001"
    depends_on:
      - sonarqube

  sonarqube:
    image: sonarqube:community
    deploy:
      resources:
        limits:
          cpus: '0.50'
          memory: 8192M
        reservations:
          cpus: '0.25'
          memory: 2048M
    hostname: sonarqube
    container_name: sonarqube
    depends_on:
      - db
    environment:
      SONAR_JDBC_URL: jdbc:postgresql://db:5432/sonar
      SONAR_JDBC_USERNAME: muratcan
      SONAR_JDBC_PASSWORD: yeldan
    volumes:
      - sonarqube_data:/opt/sonarqube/data
      - sonarqube_extensions:/opt/sonarqube/extensions
      - sonarqube_logs:/opt/sonarqube/logs
    ports:
      - "9000:9000"
  db:
    image: postgres:15
    hostname: postgresql
    container_name: postgresql
    environment:
      POSTGRES_USER: muratcan
      POSTGRES_PASSWORD: yeldan
      POSTGRES_DB: sonar
    volumes:
      - postgresql:/var/lib/postgresql
      - postgresql_data:/var/lib/postgresql/data

volumes:
  sonarqube_data:
  sonarqube_extensions:
  sonarqube_logs:
  postgresql:
  postgresql_data:
Conclusion
In this article, we create a Java application that utilizes the RestClient to communicate with the SonarQube Web API. This application generates a simple monthly report of created and resolved issues in PDF format. Upon successful creation of the report, the application notifies the user via Slack.
You can find source code here.
Thank you for reading my article. Happy coding!